Smart Garage Door Openers: Automation and Security
Your garage door is one of the largest moving entry points into your home, yet most people treat it as an afterthought when building out a smart home system. The garage door opener that came with the house nine years ago still works, so why change it? The answer shows up the moment you drive away and cannot remember whether you closed it. Or when the delivery driver leaves a package on the porch while your unmonitored garage sits open for forty-five minutes. Or when you realize your teenager has been leaving the garage open all afternoon because pressing a button is apparently too much effort.
Smart garage door openers solve a specific, concrete set of problems: knowing the state of your door from anywhere, controlling it remotely, automating it so it closes itself, and integrating it with the rest of your security system so the door becomes part of a coordinated response rather than a blind spot. This article covers how these systems actually work, what they cost, what the security tradeoffs are, and how to fit one into a broader home automation setup from entry-level to professional-grade.
How Smart Garage Door Openers Actually Work
There are two fundamentally different approaches to adding smarts to your garage door, and understanding the difference will prevent you from buying the wrong thing.
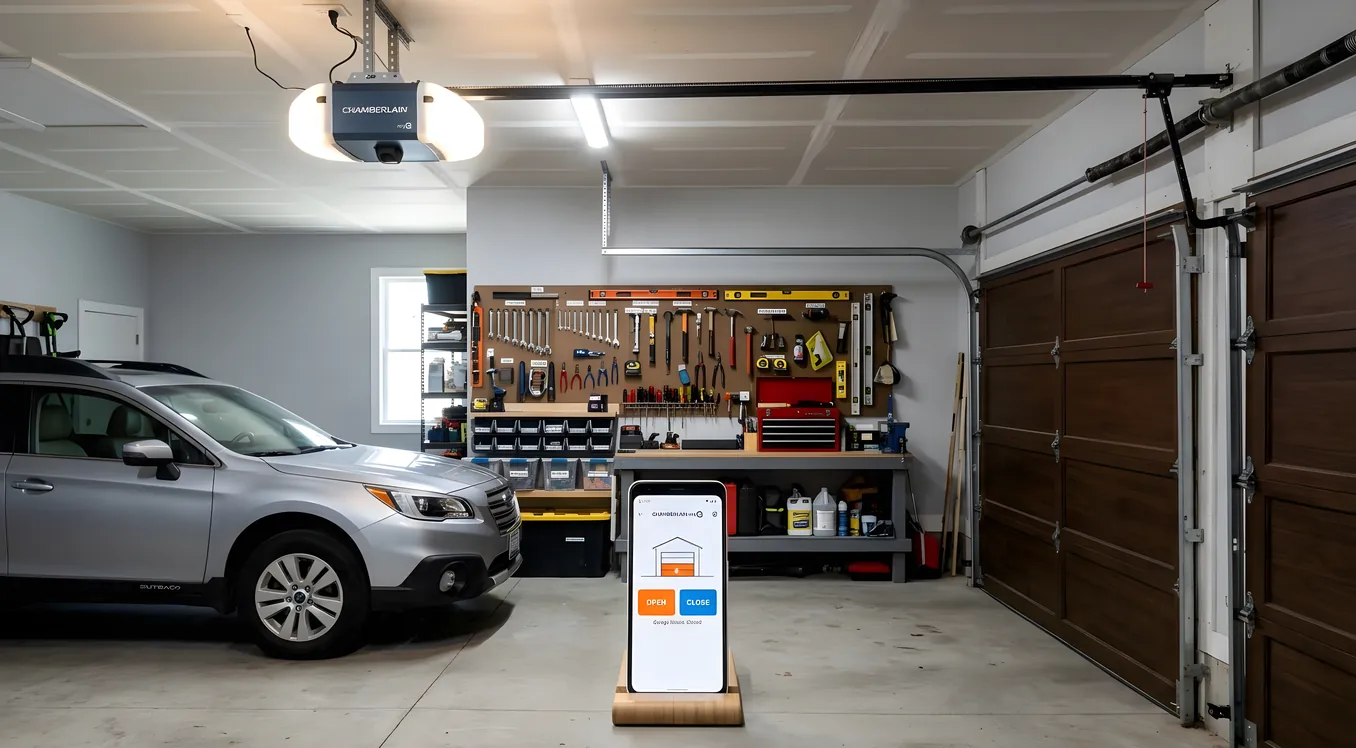
The first approach is a retrofit smart controller. These are small devices, typically in the $30 to $100 range, that you add to an existing garage door opener. They connect to the same wiring terminals your wall button uses, use your home’s WiFi, and give you remote control and monitoring through an app. The most widely used examples are the Chamberlain myQ Smart Garage Hub ($29.99), the Meross Smart Garage Door Opener ($30 to $40 depending on the variant), and the Tailwind iQ3 ($80).
The second approach is a replacement opener with smart capabilities built in. Chamberlain and LiftMaster (which are the same company, with LiftMaster being the professional/contractor line) sell openers with myQ technology integrated directly. Models like the LiftMaster 87504-267 (belt drive, $350 to $400 installed) or the Chamberlain B2405 ($199 at retail) come with WiFi and camera built in, no hub required.
The retrofit approach makes sense when your existing opener is mechanical sound and you just want remote access. The replacement approach makes sense when the opener is aging, you want a camera built into the unit, or you need a specific integration that only works with the manufacturer’s native platform.
One protocol detail worth knowing: most consumer smart garage products use WiFi. Professional integrators working with Control4, Savant, or Crestron typically use a different path, reaching the garage door through a relay-based driver or a Zigbee-connected controller like the Linear/GoControl GD00Z-8. If you are planning a professionally integrated system, ask your integrator early in the process how they handle garage door control, because the answer affects which opener you should buy.
What “Smart” Actually Gets You
Remote control is the obvious feature, but it is the least interesting one. The real value comes from monitoring and automation.
Monitoring means you get a notification when the door opens or closes, and you can check its state from anywhere. This sounds simple but the practical value is significant. You can confirm the door closed after you left. You get an alert if it opens at 2am. You know when your kids got home from school. For about half of buyers, this alone justifies the purchase.
Schedules and auto-close let you set rules: close the garage door automatically if it has been open for more than 15 minutes, or never allow the door to be open between midnight and 6am without sending an alert. The Chamberlain myQ app supports automatic closing with a user-defined timer. Tailwind’s app is stronger here, with geofencing support that can trigger door close when your phone leaves a defined radius.
Integration with the rest of your security system is where smart garage openers become genuinely powerful rather than just convenient. If you have a monitored alarm system or a smart alarm system with self-monitoring capability, you can set up rules like: if the security system arms in “away” mode, verify the garage door is closed and close it if it is open. If the garage door opens when the alarm is armed, trigger an alert. If you have a video doorbell or security cameras covering the driveway, you can correlate footage with door open/close events. The door is no longer a standalone device; it becomes part of a system.
Voice control through Amazon Alexa, Google Home, or Apple HomeKit lets you ask “is the garage door closed?” or tell it to close without touching your phone. Amazon and Google both support myQ natively. Apple HomeKit requires a separate bridge device for most openers; the Meross unit is one of the few that includes HomeKit support at a reasonable price.
Security Architecture: What You Should Actually Be Worried About
Smart garage door openers introduce two different categories of security risk, and homeowners typically worry about the wrong one.
The risk people focus on: hackers remotely opening your garage door over the internet. This is technically possible but practically rare. Reputable manufacturers use TLS-encrypted cloud connections and modern authentication. Chamberlain, LiftMaster, and the major players have had reasonable security track records. The realistic attack surface for a home user is much smaller than the headlines suggest.
The risk people underestimate: weak physical security that a smart opener cannot fix. Rolling code technology (which every opener sold in the past fifteen years uses) prevents the old-school “code grabber” attacks. But if someone can see through your garage door windows, wait for an opportune moment, and walk through an unlocked door between the garage and the house interior, your network security is irrelevant. Pairing your garage system with access control and ensuring that interior door has a proper lock matters more than obsessing over encryption protocols.
The other real risk is account security. If someone gets your myQ login credentials, they can open your door from anywhere. Use a unique, strong password and enable two-factor authentication on your account. This is true for any cloud-connected security device.
For users who want to avoid cloud dependency entirely, local-only control is possible but requires more technical effort. Home Assistant with a Z-Wave controller (using the Linear GD00Z-8, for example) gives you local control with no cloud required, though you lose the manufacturer’s native app and its conveniences.
Costs: What to Expect at Each Level
Retrofit smart controller, DIY: $30 to $100 for the device. Installation is typically 20 to 30 minutes for someone comfortable following instructions. The Meross MSG100HK ($40) and Chamberlain myQ Hub ($30) are the two most commonly recommended starting points. Total cost: $30 to $100.
Replacement opener with built-in smart features: Chamberlain B2405 (belt drive, WiFi, 1.25 HP equivalent) retails for $199. The B6753T ($279) adds a camera. LiftMaster 87504-267 (belt drive, WiFi, camera) runs $300 to $350 at retail, often $350 to $450 installed by a dealer. If you need a new opener anyway, the incremental cost of going smart is small.
Professional integration into a Control4, Savant, or Crestron system: Add $200 to $500 for the integration work on top of the opener hardware. The integrator will typically use a relay driver or a third-party module (RTI, Control4 drivers, etc.) to get the garage door into the same programming as the rest of your home. At this level, the door can be part of “leaving home” scenes, arm sequences, and security rules that execute without any user interaction.
Complete door replacement plus smart opener: If you are replacing an aging door, add that cost separately. A standard 16x7 foot two-car garage door ranges from $800 to $2,500 installed depending on material and insulation. A new opener adds $200 to $400. Budget $1,200 to $3,000 for the full package.
Pairing With Door Locks and Entry Systems
The garage door does not exist in isolation. How you think about it connects directly to how you have handled keyless entry for the rest of the house. If you have already moved to a smart lock system on your front and back doors, the garage door is the obvious next piece to bring into the same ecosystem.
The practical goal is a single point of control and a consistent security posture across all entry points. You should not have to check three different apps to know whether the house is secure before bed. Well-integrated systems on platforms like Control4 or Apple Home let you check everything from a single interface.
One specific use case that is worth calling out: the combination of a smart garage opener and a smart door lock on the interior access door between the garage and the house gives you two-factor physical security. A delivery service or house cleaner with a temporary code can open the garage, but the interior door still requires separate authorization. This is the same principle as layered digital security, applied to physical access.
Video Monitoring Inside the Garage
Several newer opener models include an onboard camera. The LiftMaster 87504-267 has a 1080p camera with wide-angle view pointing at the interior of the garage. Chamberlain’s B6753T is similar. These cameras serve two purposes: they let you visually confirm the door position when the sensor reading seems uncertain, and they give you footage of who entered the garage and when.
These built-in cameras are modest. They cover the garage interior but not the driveway. For driveway coverage, a separate camera mounted above the door on the exterior or a video doorbell positioned to see the driveway is a better choice. The Ring Spotlight Cam Wired ($100) mounted on the garage exterior is a common pairing; it gives you motion-triggered footage of vehicles pulling in and people approaching the door.
If you are connecting this to a broader camera system, note that the opener’s built-in camera typically only works with the manufacturer’s app and does not integrate into third-party NVR systems. For a unified camera view, stick with purpose-built security cameras on a common platform rather than trying to pull the opener’s camera into your NVR.
Integrating Into Control4 and Savant Ecosystems
For homeowners working with a professional integrator on a full Control4 or Savant system, the garage door is a standard device type that integrators handle routinely. The approach varies by platform.
Control4 has certified drivers for myQ (through Chamberlain’s commercial API, note that the consumer API has had availability issues over the years) and supports relay-based control for any opener via its relay outputs on the controller or a dedicated relay module. The integrator programs the garage door into the same interface as everything else: a floor plan view, a security summary screen, and behavioral rules.
Savant uses a similar approach. The garage door appears as a device in the Savant app with open/close control and state reporting. Savant’s Pro App gives you a single interface for lighting, climate, security, and access in a way that makes the garage door a natural part of the home overview rather than a separate thing to check.
RTI, URC, and Crestron can all handle garage door control through relay drivers as well. If you are at the level of a professionally integrated system, bring your integrator in before you buy hardware, because their platform preferences and existing dealer relationships may affect the best choice of opener for clean integration.
One pattern worth knowing: integrators often prefer LiftMaster over Chamberlain because LiftMaster operates through commercial and professional channels with more consistent API access. The underlying hardware is often identical, but the support relationships differ.
Geofencing and Arrival Automation
The most practically useful automation for a smart garage opener is arrival-based. When your phone crosses a geofence boundary on the way home, the garage door opens automatically. You pull into the driveway without touching anything. This works reliably when implemented well, but there are real limitations worth understanding before you rely on it.
Geofencing accuracy on phones varies. GPS in a moving vehicle at highway speed can produce boundary crossings that trigger the opener while you are still a mile away. Most apps compensate by using a combination of GPS and cell tower triangulation, and by requiring the phone to be moving in the right direction, but imprecise triggers still happen.
Battery saver modes on iOS and Android can delay geofence events by several minutes. You may pull into the driveway before the opener fires.
Security-minded homeowners are sometimes uncomfortable with the garage door opening automatically without any deliberate user action. The compromise position: use the geofence as a notification (“you are arriving, door is closed, tap to open”) rather than an automatic open. You get the convenience of not navigating the app while still requiring intentional action.
Tailwind’s iQ3 is the retrofit controller with the strongest geofencing implementation among consumer products. MyQ’s geofencing works but has been more inconsistent in user reports. If geofencing is your primary use case, the Tailwind is worth the extra $40 to $50 over the basic myQ hub.
Choosing the Right Option for Your Situation
A few decision paths that cover most homeowners:
If your existing opener is less than 10 years old and functional, start with a retrofit controller. The Meross MSG100HK ($40) gives you HomeKit support, solid app reviews, and works with virtually any opener. If you do not need HomeKit, the Chamberlain myQ Hub ($30) is reliable and widely available. Spend the saved money on a better camera for the driveway instead.
If your opener is aging or you want a camera inside the garage, replace the opener. The Chamberlain B6753T ($279, includes camera) or LiftMaster 87504-267 ($300 to $400) are the two models integrators and buyers come back to repeatedly. Both use 1/2 HP or 3/4 HP motor equivalents (listed as “lifting force” rather than true HP in current specs) and include battery backup, which is genuinely useful in a power outage.
If you are building a professionally integrated system with Control4, Savant, or similar, discuss the opener choice with your integrator before buying anything. Tell them your platform and let them specify the hardware. The $30 you might save buying on Amazon could create hours of integration headaches on a driver that does not play cleanly with your controller.
If local control and no cloud dependency are priorities, Home Assistant with the Linear GD00Z-8 (Z-Wave garage door controller, about $55) gives you fully local control with automations, monitoring, and integration with every other Home Assistant device. Requires a Home Assistant hub (an Intel NUC or dedicated machine, or a purpose-built device like the Hubitat Elevation at $149) and some configuration comfort.
Getting the Installation Right
Physical installation of a retrofit controller is straightforward for most people. The device connects to the same two terminals your existing wall button uses. The sensor (typically a magnetic contact, similar to a door/window sensor on a security system) attaches to the door track and the door itself with adhesive. The hardest part is usually running the sensor wire neatly from the door track back to the opener unit.
One installation point that catches people: if your opener uses a “smart” or “security+” wall panel with additional features (a screen, light control, etc.), a generic retrofit controller may not work with the existing wall panel. Chamberlain’s myQ ecosystem is designed to work alongside their smart wall panels. Third-party controllers sometimes cause interference. Check compatibility before buying if you have a Chamberlain or LiftMaster opener made after 2011 with a yellow “learn” button (Security 2.0 protocol).
For a full opener replacement, the installation is similar to any garage door opener: ceiling bracket, opener unit, drive rail assembly, safety sensors at the floor level, and wiring. A competent DIYer can do this in two to three hours following the manual. If you are not comfortable with the overhead work or the electrical wiring, a one-person installation by a garage door company typically runs $75 to $150 beyond the hardware cost.
When Smart Is Not Enough
Smart garage door openers are excellent tools, but they address the garage door specifically. They do not replace a comprehensive security posture. If you are genuinely concerned about entry security, the more impactful moves are often elsewhere: a monitored alarm system, cameras covering the key approach angles, and physical door and lock quality.
The garage door is often the most vulnerable entry point not because of electronics but because of the emergency release cord. The red cord hanging from the trolley can be tripped from outside through the top gap of a garage door with a simple fishing technique using a thin wire hook. This “fishing” vulnerability has been publicized for years. A simple fix: a zip tie looped through the cord pull prevents it from moving when triggered from outside. It is a 30-second countermeasure that many homeowners never know about.
Smart technology on top of a physically vulnerable door is less secure than the smart technology on top of a well-secured door. Start with the basics, then layer the automation on top.
Making the Decision
Smart garage door openers are one of the genuinely useful categories of home automation: real problems (did I close the door, who is in my garage, why is the door open at 2am) solved at a reasonable cost with technology that actually works reliably. The $30 to $100 retrofit route is accessible to anyone. The integrated-system route scales up to whatever complexity your home demands.
The practical starting point for most homeowners is a $40 retrofit controller, ten minutes of installation, and a week of using the monitoring features to see what behavior patterns actually look like. If you find yourself checking the app constantly or setting up automations, you will have a much clearer picture of what to invest in next. If it sits unused after two weeks, you have spent $40 to learn something useful about your own habits.
For homes where the garage door is one piece of a larger access control picture, the conversation belongs with an integrator who can see the whole system. One door wired in isolation is a convenience. A garage door that knows about your alarm state, your camera coverage, your lock status, and your daily schedule is a real security asset.